
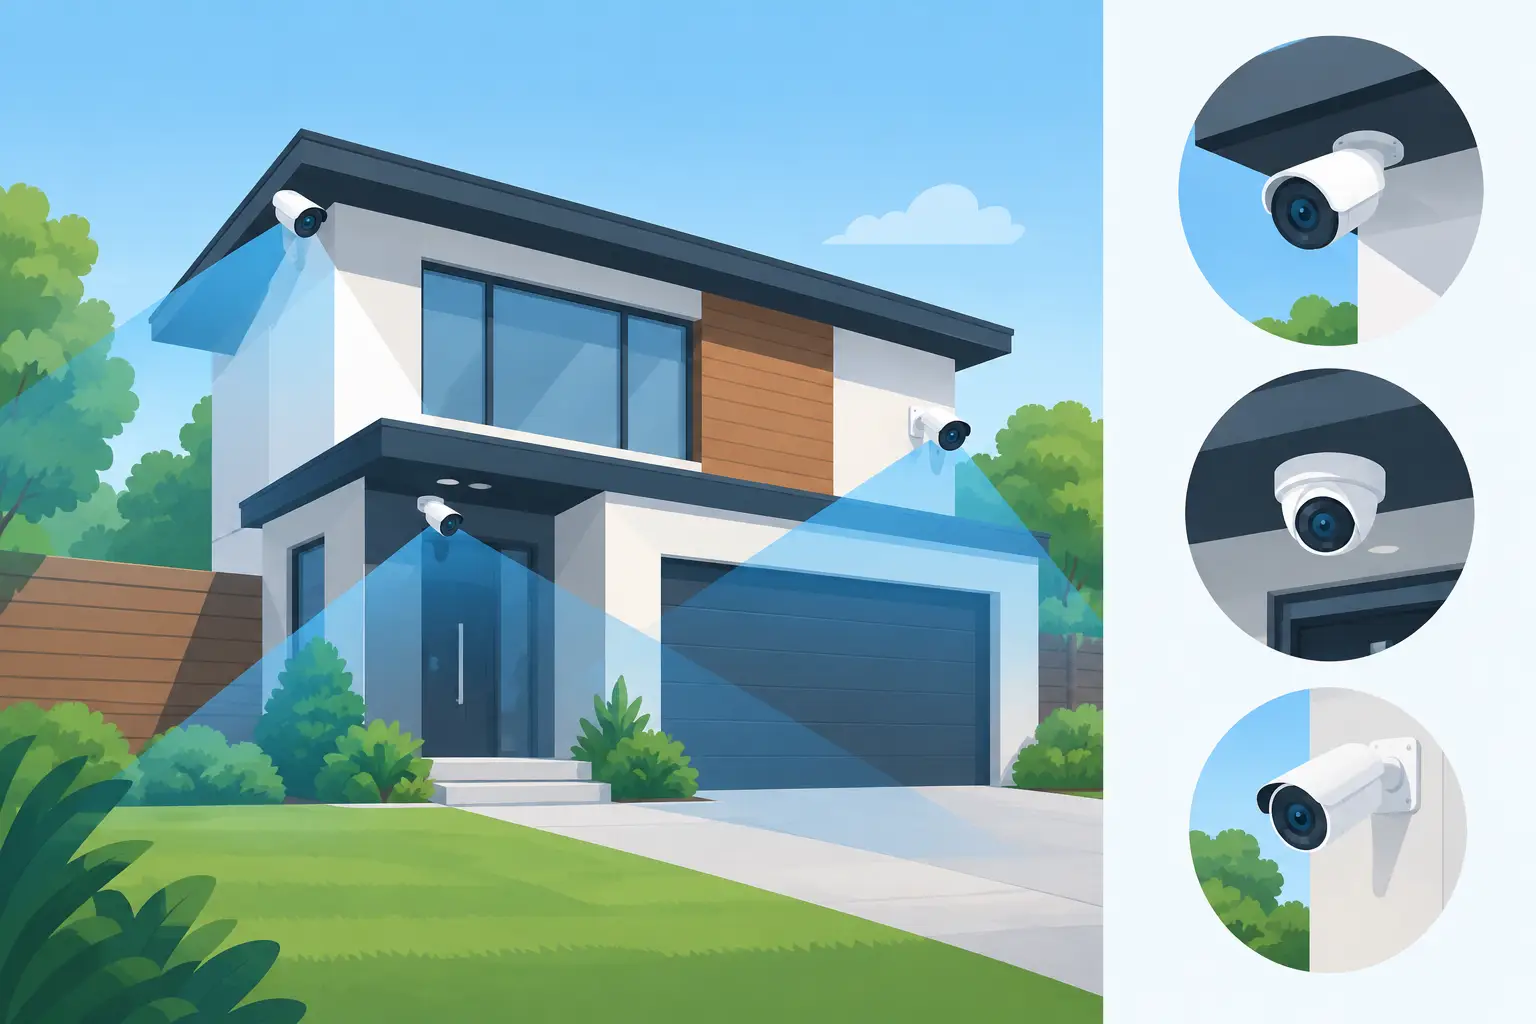


Learn how to position security cameras for clear evidence, safer access points and dependable night coverage at home or your business property every day.
Smart Lighting CCTV That Actually Helps at Night

Most CCTV footage fails at the exact moment you need it – when someone is moving quickly, it is dark, and you need a face or a number plate rather than a silhouette. That is where smart illumination earns its keep. Security cameras with smart lighting are not just “a brighter image”. Done properly, they change the behaviour of an intruder, reduce missed detections, and give you night-time evidence you can actually use.
The catch is that the term gets used loosely. One system’s “smart lighting” is a constant white floodlight that annoys the neighbours. Another is intrusion-triggered illumination that comes on only when it should, for exactly as long as it should, and supports colour night coverage when it matters. The difference is in how it is designed, positioned, and configured.
What “smart lighting” means in CCTV terms
Smart lighting in a camera system is lighting that is controlled by events and rules, not just a dusk-to-dawn timer. The camera and recorder can use motion analytics, line crossing, intrusion zones, schedules, and brightness settings to decide when to illuminate and how.
In practical terms, you typically see three approaches. Some cameras use built-in white LEDs for close-range colour at night. Others trigger separate external lighting, often via an alarm output or integration with an intrusion system. And some combine infrared (IR) for general coverage with white light only when a person or vehicle is detected, so you get discreet monitoring most of the time and colour detail during an incident.
It depends on the site. A quiet rear garden, a busy car park, and a nursery entrance each need different rules to avoid nuisance triggers while still giving you clarity.
Why security cameras with smart lighting outperform IR-only setups
Infrared has a place. It is discreet and can reach surprisingly far. But IR-only images are usually monochrome, and the detail you care about most is often lost. Dark clothing blends into dark backgrounds. Faces can blow out if the subject is close. Reflective number plates can flare. If you are trying to identify rather than merely observe, colour is a major advantage.
Smart lighting brings three concrete gains.
First, it increases actionable visibility. When white light is used at the right intensity and angle, you get colour footage that can show clothing colour, vehicle paintwork, and clearer facial detail.
Second, it improves detection reliability. Many cameras perform better when the scene is properly illuminated. You get fewer missed events and fewer “ghost” triggers from insects, headlights, or IR flare.
Third, it adds deterrence. A sudden light turning on when someone crosses a boundary is a clear signal: you have been seen. That moment of uncertainty is often enough to make a would-be intruder abandon the attempt or move on.
There is a trade-off. Any light can annoy residents, staff, or neighbours if it is poorly aimed or overused. The goal is controlled illumination, not a permanent flood.
Where smart-lit cameras make the biggest difference
For homeowners, the biggest wins are usually at the front approach, side passage, driveway, and rear patio doors. These are common access routes and the places where poor night footage is most frustrating. Smart lighting allows you to keep the property calm and dark most of the time, while still capturing colour detail the moment someone enters a defined zone.
For small-to-mid-sized businesses, loading areas, car parks, and staff entrances often benefit most. These areas have movement at odd hours and a higher chance of vehicles and reflective surfaces, which can confuse basic motion alerts. Properly set analytics plus event lighting can separate normal activity from suspicious approach.
For managed and regulated environments such as nurseries and multi-occupancy buildings, the priority is usually accountability and controlled entry rather than aggressive deterrence. Here, smart lighting can be scheduled and restrained – enough to support identification at the door and along the approach, without turning entrances into a glare source for residents.
Getting it right: design decisions that matter
The camera model matters, but placement and configuration matter more. A good design starts with the outcome you need: detect, deter, identify, and evidence.
Choose illumination that fits the distance
Built-in LEDs are excellent at close-to-medium range. If you need coverage across a long driveway or a wide yard, you may need a camera with stronger illumination or separate lighting designed for that throw. Otherwise, you will end up with bright foreground and a dark background – the exact opposite of what you want.
Aim light to avoid glare and complaints
Light reflecting off white walls, glossy doors, or signage can wash out footage. The same applies to rain and fog, which can create a bright haze close to the lens if the light is poorly positioned. The answer is usually angle and separation: mount at the right height, avoid pointing directly at reflective surfaces, and consider moving illumination away from the lens if the environment demands it.
Neighbour impact is a real consideration in the UK, especially in terraced streets and tight side passages. Smart lighting should be shaped and directed to your boundary, not into upstairs windows.
Use analytics, not just motion
Plain pixel motion is easily triggered by shadows, insects, and headlights. Analytics such as person and vehicle classification, intrusion zones, and line crossing are far better foundations for lighting triggers. You can also set schedules so lighting behaves differently at 6pm than it does at 2am.
The goal is fewer, better events. If the light triggers constantly, users start ignoring notifications, and you lose the deterrent effect.
Decide how “loud” you want the system to be
Some sites benefit from an obvious response: light on, notification, and perhaps an audible warning from a camera speaker. Others need discretion. A back garden overlooking neighbours might be better served by IR monitoring with white light only on confirmed person detection.
There is no universally correct setting. What matters is matching the response to the property, the hours of use, and the risk profile.
Integration choices: CCTV, alarms, and door entry
Smart lighting becomes more valuable when it is part of a wider, correctly configured system.
If you already have an intrusion alarm, you can often align zones so a perimeter breach triggers both lighting and higher-priority recording. This helps when you need to review an incident quickly: the event is marked, the clip is clearer, and you are not scrubbing through hours of low-value motion.
For controlled entry, door entry systems and CCTV work well together. In multi-occupancy and managed buildings, a video door entry platform (for example, IP systems with POE-connected indoor monitors) can be paired with external cameras that provide a lit, colour view of the approach and doorway. That gives staff and residents better confidence when granting access and supports clear audit trails.
The key is avoiding overlapping tech that creates confusion: three apps, two sets of alerts, and nobody sure what is armed. A professional design should reduce daily effort, not add to it.
Common mistakes we see with smart-lit cameras
A lot of disappointment comes from expectations set by marketing images rather than real site conditions.
One common issue is mounting too low. It seems intuitive for faces, but it increases the risk of tampering and often produces more glare. Height gives you a better overall scene, and with the right lens and angle you can still capture identification-level detail.
Another is using white light as a permanent night mode. That can create neighbour complaints, light pollution, and a false sense of security when occupants end up disabling the feature. Smart lighting should be event-led, with sensible timeouts and sensitivity settings.
A third is ignoring the background. If the camera is aimed at a bright street lamp or passing headlights, you will fight exposure problems all night. Sometimes a small change in angle or a different mounting point makes the difference between usable footage and constant flare.
What to ask for in a site survey
If you are comparing installers or systems, ask questions that force a real design conversation.
Ask where the camera will be positioned and why, not just how many cameras you are getting. Ask how lighting will be triggered and how false alerts will be reduced. Ask what the night image will look like in rain, and whether reflective surfaces will cause problems. And ask how the system will behave day-to-day – how you view footage, how you receive alerts, and who supports you if settings need adjusting after you have lived with it for a few weeks.
This is also where a consultative approach matters. You do not want the brightest possible light everywhere. You want the right light, at the right time, to give you control without disrupting the property.
If you want guidance on a right-fit design, a free survey and no-obligation quotation is the safest starting point. That is how we approach projects at NRI Security Ltd: specify for the site, explain the trade-offs plainly, and make sure support continues after installation.
The real value: control, not just clearer footage
Security is not measured by how impressive the camera looks on the wall. It is measured by what happens when there is movement at 1am and you need to know, quickly and confidently, whether it is a fox, a delivery, or a real threat.
Smart lighting earns its place when it reduces doubt. The best systems stay quiet in normal conditions, then respond decisively when boundaries are crossed – giving you colour detail, better identification, and a clearer path to action.
A helpful way to think about it is simple: the right camera sees in the dark, but the right design makes the dark work in your favour.

Is a PoE Video Intercom Worth It?
Choosing a poe video intercom with indoor monitor? Learn what PoE really changes, what to specify, and how to avoid common installation pitfalls.
CCTV Maintenance Checklist for Businesses
Use this CCTV maintenance checklist for businesses to test cameras, recordings, remote access and lighting, so your premises stay protected every day.
Best Commercial Security System Features
Compare the best commercial security system features for dependable CCTV, controlled entry and faster response across offices, flats and managed sites.

Best CCTV for Night Vision: What Works
Choosing the best cctv for night vision? Learn what actually improves night footage: sensors, lighting, placement, and pro setup for real clarity.

How to Improve Apartment Entry Security
Learn how to improve apartment entry security with better access control, CCTV, lighting and door entry planning for safer shared buildings.

Smart Illumination Security Cameras Explained
Learn how smart illumination security cameras improve night-time visibility, deter intruders and give homes and businesses clearer evidence.

Wireless Alarm App Control Guide
Wireless alarm app control guide for homes and businesses. Learn setup, permissions, alerts, and remote use without losing reliability or control.

Home Surveillance That Gives You Clear Control
Plan home surveillance around real risks, clear evidence and simple daily use. Learn where cameras, lighting and professional setup make a difference.

Best CCTV for Detached Houses in 2026
Choosing the best cctv for detached houses comes down to coverage, lighting, recording and install. Get a clear, practical spec that fits.

CCTV retention duration: how long is right?
Set a CCTV retention duration that protects your property, supports investigations and respects UK data protection duties without wasting storage space.

Colour Night Vision CCTV Cameras: Worth It?
Colour night vision CCTV cameras capture clearer detail after dark, helping you identify people and vehicles. Learn how they work and where they fit.