


CCTV for trades yard tool theft prevention helps deter intruders, protect stock and capture clear evidence with the right design and placement.
How to Position Security Cameras Properly
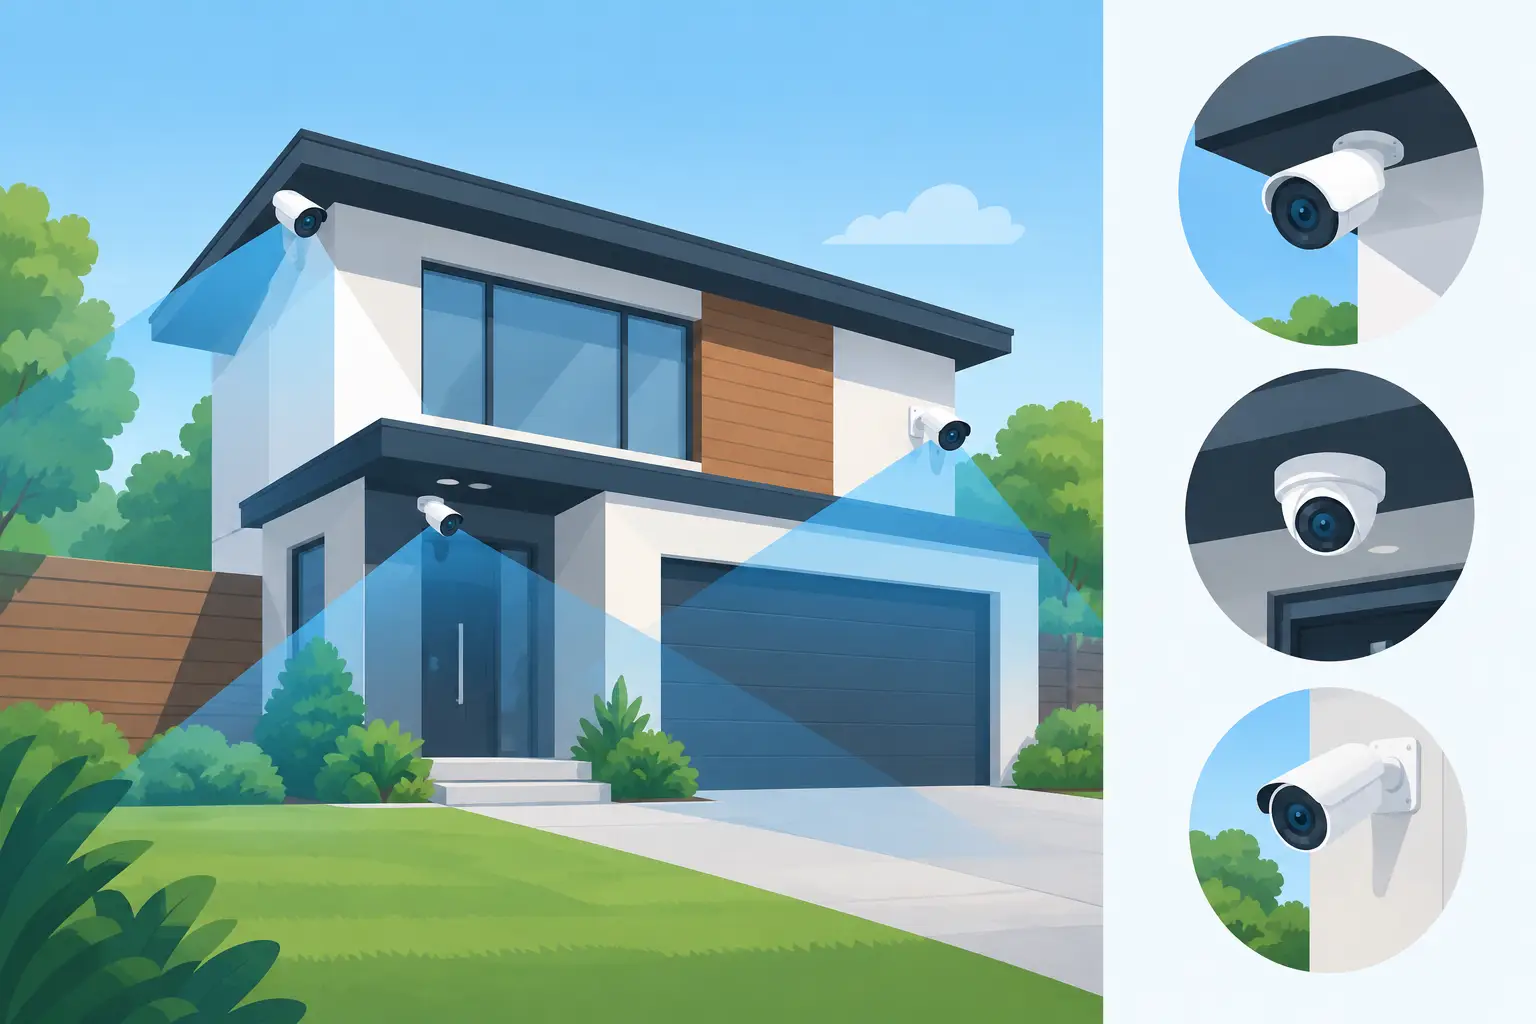
A camera can be expensive, high-resolution and connected to your phone, yet still fail at the moment it is needed if it is pointed at the wrong place. Knowing how to position security cameras is less about covering every inch of a property and more about capturing clear, useful evidence at the points where someone must enter, leave or pass through.
For homeowners, landlords and business managers, the right layout gives you practical control: a clear view of who approached the door, which vehicle entered the drive, and what happened around a restricted area after dark. The wrong layout often produces wide, distant footage where faces, number plates and actions cannot be identified.
Start with the risks, not the camera locations
Walk the site before deciding where a camera should go. Think as an intruder, but also as the person who will need to review footage after an incident. Which routes offer the easiest access? Where are valuables stored, deliveries left or staff and visitors expected to arrive?
At a home, that commonly means the front door, side gate, driveway, rear patio doors, garage and any route connecting the front and back of the property. A detached garage, garden office or outbuilding may need its own coverage if it contains tools, equipment or stock.
At business premises, begin with entrance and exit points, reception, loading areas, vehicle gates, car parks, corridors, stock rooms and perimeter lines. The priorities will differ by site. A nursery may need reliable views of authorised collection points and access routes, while an office may need stronger coverage of reception, server rooms and delivery entrances. A camera should answer a specific question, such as: who entered, when did they arrive, and where did they go next?
A site survey is valuable because sight lines that look obvious on a plan can be blocked by a fence, parked vehicle, shelving, foliage or an open door. It also prevents a common mistake: placing every camera on the front elevation because it is easiest to cable, while leaving the side and rear routes unobserved.
How to position security cameras for usable footage
The most useful camera view is usually not the widest one. Wide-angle coverage helps you understand the scene, but it can make people appear too small for reliable identification. Use overview cameras to monitor an area, then position a second camera where needed to capture faces or vehicle details at a closer range.
For entrances, aim to capture people as they approach and cross the threshold. Positioning a camera above a door can show that someone arrived, but if it looks sharply down from too high, it may only record the top of their head. A camera placed at a sensible height and slightly to one side often gives a better facial angle while remaining difficult to interfere with.
As a general rule, external cameras are often installed around 2.1 to 2.7 metres above ground level. This helps protect the equipment from casual tampering without placing it so high that faces become indistinct. The correct height depends on the lens, expected approach route and lighting, so treat this as a starting point rather than a fixed rule.
Angle matters just as much. Avoid aiming a camera directly along a long driveway or path if the goal is number plate capture. Vehicles moving directly towards the lens can create glare from headlights and leave plates at an awkward angle. A more controlled view at the entrance, where vehicles slow down or turn, is usually more effective. For faces, try to capture subjects moving across or towards a defined point rather than at the far edge of a broad frame.
Do not point every camera at the same area. Overlap can be helpful at key entrances, but two cameras recording the same wide view may leave a side passage, rear gate or blind corner unprotected. The aim is connected coverage: one camera sees someone approach, another records the entry point, and a third follows the route towards sensitive areas where appropriate.
Treat lighting as part of the camera system
Night footage is where poor positioning is exposed. A camera facing a bright security light, low morning sun or reflective surface can produce silhouettes rather than recognisable people. Before final fitting, check the view in daytime and after dark.
Avoid pointing cameras directly towards streetlights, vehicle headlights or windows. Reflections from glass, pale walls and wet paving can affect exposure, while infrared illumination can bounce back from soffits, drainpipes, nearby branches or cobwebs. This may create a bright haze in the image just when clear coverage is required.
Where a location is genuinely dark, a camera with suitable low-light performance and carefully positioned illumination will give better results than simply increasing brightness. Smart illumination and intrusion-triggered colour night coverage can bring detail to the scene when activity occurs, while avoiding an unnecessarily lit property throughout the night. The placement of the light should support the camera view, not shine straight into it.
Trim vegetation regularly. A branch that barely appears in the image during the day can trigger motion alerts in wind, reflect infrared light at night or hide a face at the exact wrong moment. Seasonal growth should be considered when choosing the final angle.
Cover access points in the right order
Your front door is normally the first priority, but it should not be the only one. A visitor, courier or intruder may use a side gate, rear garden access or shared entrance instead. Think about how a person could reach the property without being seen from the street.
For a typical house, a practical arrangement may include a door-entry or dedicated entrance camera, an overview of the driveway, and coverage of the rear access. If there is a side passage, it is often more valuable to view the gate and the route through it than to aim another camera across the front garden.
For flats, managed blocks and offices, entry control and video surveillance should work together. A Dahua IP video door entry system can identify callers at the door, while cameras cover the approach, communal routes and relevant access-controlled doors. POE-connected equipment can simplify power and network provision while giving installers a more dependable, managed connection than relying on weak wireless signal at a critical location.
Do not forget the practical view needed for daily use. A camera at the gate can help verify arrivals. A clear reception view helps staff deal with visitors confidently. A loading-bay camera can provide accountability for deliveries and collections. These are not just security measures – they reduce uncertainty during ordinary operations as well.
Avoid the mistakes that weaken a CCTV installation
Several placement errors appear again and again. Cameras are mounted too high for identification, aimed into direct light, or relied upon to cover more distance than their lens can realistically handle. Another frequent issue is placing a camera behind glass. At night, infrared reflection from the glass can make the image unusable, and indoor reflections can obscure detail even during the day.
Wi-Fi cameras also need careful consideration. A camera may show a good image during installation but suffer dropouts when walls, distance and network traffic come into play. For permanent external or commercial coverage, a professionally planned wired or POE installation is often the more dependable choice. It provides a stable connection and avoids regular battery maintenance, although installation routes and building fabric need to be considered.
Position cameras where they can be safely maintained. Lenses collect dirt, rain marks and spider webs. If a camera can only be reached with specialist access equipment, simple cleaning and adjustment become more difficult and costly. The best position balances protection, image quality, cable routing and future service access.
Privacy also needs to be considered from the outset. At home, keep views focused on your boundary and access points rather than neighbours’ gardens or windows. For businesses and managed properties, signage, purpose, retention settings and access to recordings should be handled responsibly. A professionally designed system should protect people and property without collecting more footage than the site genuinely requires.
Test views before the installation is signed off
Never judge a camera position from a live image alone. Walk the route you expect a person or vehicle to take. Check whether a face remains visible as someone approaches, whether the gate can be seen when it is open, and whether a number plate is readable at the required point. Repeat the test after dark and in poor weather if possible.
Review motion alerts too. A camera aimed at a busy road, swaying tree or public footpath may create a stream of notifications that staff or homeowners soon ignore. Adjust the view, detection area and sensitivity so alerts relate to genuine activity on the property. The goal is not constant movement on screen; it is meaningful information in your hand when something needs attention.
NRI Security approaches camera placement through a free site survey and no-obligation quotation, so the system is designed around the property rather than a generic package. With more than 20 years of installation experience, the focus is on clear coverage, sensible equipment choices and support after installation.
The right camera position should leave you with a simple answer when you check the footage: you can see what happened, who was involved and where they went. That reassurance begins long before the camera is switched on.

Access Control for Small Business Office Use
Access control for small business office sites improves safety, accountability and day-to-day entry management without adding unnecessary complexity.

Smart Door Entry for Nurseries Safeguarding
Smart door entry for nurseries safeguarding helps control access, verify visitors and support staff with clear, reliable entry records and video.

Do I Need Signs for CCTV in the UK?
Do I need signs for CCTV in the UK? Learn when CCTV signs are required, when they help, and how to stay compliant at home or work.

Wired Alarms vs Ajax Wireless
Wired alarms vs Ajax wireless – compare reliability, disruption, cost and control to choose the right alarm system for your home or business.

Choosing a Panic Button Alarm for Home Security
A panic button alarm for home gives you a fast way to raise an alarm. Learn where it helps, key features and why professional fitting adds confidence.
Home CCTV Installation That Covers What Matters
Plan a home CCTV installation with clear coverage, useful colour night vision, remote access and professional support that protects what matters most, daily.

How to Plan Office Surveillance Properly
Learn how to plan office surveillance with the right camera positions, access points, privacy controls and night coverage for clear evidence.

Analogue CCTV vs IP: Which Should You Choose?
Analogue CCTV vs IP – compare image quality, cost, cabling, remote access and future upgrades to choose the right system for your property.

Best CCTV for Detached Houses in 2026
Choosing the best cctv for detached houses comes down to coverage, lighting, recording and install. Get a clear, practical spec that fits.

Best Access Control Options for Landlords
Compare the best access control options for landlords, from fobs to IP video entry, and choose a secure, manageable system for every property with ease.

Access Control Installation for Apartment Blocks
Access control installation for apartment blocks improves entry security, resident safety and daily management with the right system design.